- [Sturdy Construction]: The tunnel is made of durable HDPE material, safe and odorless. The crawl tunnels are sturdy construction. The Caterpillar’s large boot-shaped “feet” helps keep the tunnel securely in place while children play.
- [Kids Play Structure]: Let your kids climb and crawl in colorful caterpillar shaped tunnels with this play structure. The structure of play provides children with an imaginative play area and helps improve motor skills.
- [Advantage]: This game tunnel can help children develop vestibul development, balance, hand and foot coordination, and can help children develop brain. Provide your child a stable playground with this crawling tunnel, suitable for everyday use.
- [Indoor & Outdoor]: Set up a play tunnel indoors or outdoors for a variety of play options. Use your play tunnel in the rain, or glow in the backyard or playroom. Suitable for kindergarten, day care, home and so on.
- [Suitable Age]: This tunnel is a mountain climbing structure that is perfect for children ages 3 to 6. It helps develop motor skills as they climb, crawl, and interact with the structure of colorful play.
Kids Caterpillar Tunnel Outdoor Indoor Climb-N-Crawl Play Equipment
√ Price Range: US$59 – US$79
This caterpillar tunnel is a great way to keep children active, engaged and entertained. Designed as a caterpillar, its colourful appearance will capture their imagination when they crawl, climb and play, making up creative games as they go along. There are boot-shaped feet on either side, keeping the tunnel stable and balanced, whilst the smooth edges prevent cuts and scratches, creating a safe space for fun and games.
Produc Number: SH013
Dimensions: 105*45*64cm
Main Materials: High Density Polyethylene
Age Group: 3-6 years old
Colors: Customizable
Item weight: 20kg
Max Total Kids: 60kg
Packaging & Shipping
Packing methods for playground equipment involve the careful and efficient arrangement of various components, structures, and materials to ensure safe transportation, storage, and installation. These methods aim to prevent damage, maximize space utilization, ensure that the playground equipment arrives at its destination in good condition and can be efficiently assembled for safe use.
Packing/Loading
1. Disassembly and Modular Packing: Playground equipment, such as slides, climbing frames, and swings, can often be disassembled into smaller components. These components are then packaged separately or in modular sets, making them easier to transport and store. This method reduces the overall size of each package and allows for more efficient use of space.
2. Bubble Wrap and Cushioning: Fragile parts or components made of sensitive materials, such as plastic or glass, are wrapped in bubble wrap or other cushioning materials. This provides protection against impact and minimizes the risk of scratches or breakage during transit.
3. Labeling and Organization: Clearly labeling each package with information such as contents, assembly instructions, and handling guidelines ensures that the playground equipment is easily identifiable and manageable during transportation and installation.
Shipping Term
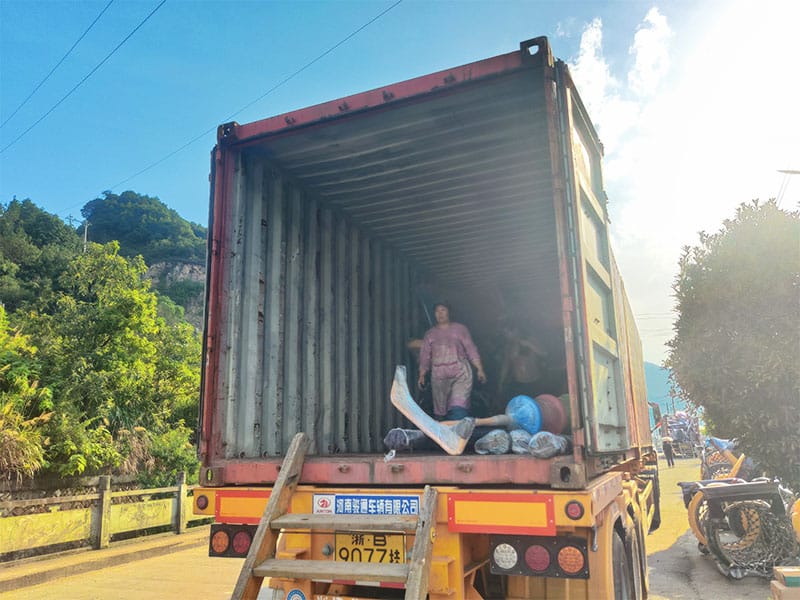
There are 3 major shipping ways to transport the goods to clients: By express, by air and by sea. For playground equipment, some of the commonly used shipping terms by sea include:
1. FOB (Free On Board): The seller is responsible for getting the playground equipment to the port of shipment and loading it onto the vessel. The buyer then takes responsibility for the transportation, insurance, and other costs from the port of shipment to the final destination.
2. CIF (Cost, Insurance, and Freight): The seller is responsible for the cost of the playground equipment, insurance, and freight to transport the equipment to the port of destination. The buyer covers any costs beyond that point, including unloading and transportation to the final location.
3. EXW (Ex Works): The buyer is responsible for the entire shipping process, from picking up the playground equipment at the seller's location to arranging transportation, insurance, and delivery to the final destination.
Installation
The assembly of a toddler slide typically involves the following steps:
- Unboxing and Organizing Parts:
- Carefully open the box and lay out all the components.
- Make sure all parts are accounted for, including screws, bolts, nuts, and tools if provided.
- Identify the main parts: the slide surface, side rails, steps, and any additional accessories like handles or bases.
- Preparing the Base:
- If the slide has a base or a support structure, start by attaching the legs or supports to the slide platform using the provided screws and bolts.
- Ensure the base is stable and secure.
- Attaching the Slide Surface:
- Connect the slide surface to the base. This may require attaching the slide directly to the support structure with screws or using brackets to secure it in place.
- Double-check alignment to ensure the slide surface is level and properly connected.
- Assembling the Side Rails:
- Install the side rails along the slide surface. These help keep the toddler safe as they slide down.
- Attach the rails securely, often with screws or plastic connectors, making sure they are firmly in place.
- Assembling the Side Rails:
- Install the side rails along the slide surface. These help keep the toddler safe as they slide down.
- Attach the rails securely, often with screws or plastic connectors, making sure they are firmly in place.
- Attaching the Steps or Ladder:
- If the slide includes steps or a ladder, assemble these parts next.
- Attach the steps to the side structure or base, ensuring they are stable and evenly spaced for easy climbing.
- Safety Features:
- Install any safety features like handrails, bumper guards, or additional padding if included in the design.
- Ensure all sharp edges are covered, and check that all parts are securely fastened to avoid any hazards.
- Final Inspection:
- Perform a thorough inspection to ensure all parts are properly tightened and secured.
- Test the slide by gently pressing or pulling on the different sections to make sure it is stable and safe for use.
This process can vary slightly depending on the design, so always refer to the specific instructions provided by the manufacturer for the best results.
Payment Term
Payment Term (T/T Payment):
We usually do 30% deposit by T/T payment before production, and remaining 70% payment before shipment. For our old customers who are temporarily short of cash flow , we can do 10%-20% payment upfront, and the balance payment upon receiving the B/L copy or 10 days before the cargo arrived.
What’s T/T Payment?
T/T payment stands for “Telegraphic Transfer.” In other words, an international wire of funds from the buyer’s bank to the seller’s bank.
When a Chinese supplier asks for a T/T payment, what they really mean is they want a wire transfer. (Technically, a T/T payment is not exactly the same as a wire transfer through the SWIFT system, but the vast majority of people think of them as the same thing.)
A wire transfer based on SWIFT is the most common payment method in international trade with Asian countries. It typically takes 3-5 working days to clear, and generally costs between 25 and 50 USD, depending on your agreement with the commercial department in your bank.
What Is the Most Common Payment Term Requested by Chinese Suppliers?
- You get all the information that you need to know from the suppliers.
- You send a 30% deposit (by T/T payment) before production starts.
- Your supplier (the manufacturer & exporter) purchases the components and/or materials and arranges the production.
- You have the suppliers inspect product quality before shipment.
- You send the remaining 70% (by T/T payment) before shipment.
- The supplier ships the goods and sends you the documents by express courier.
In graphical form, it looks like this:
How to Make T/T Payment?
Contact the commercial department of your bank, tell them you need to wire (for example) 25,000 USD to a company in China, and they will generally give you a form to fill out. If you do T/T payments frequently, your bank probably has an ‘internet banking’ application that will save you time.
Your supplier will probably send you a pro forma invoice that includes their bank account information. I strongly suggest you ask for that information earlier (as part of your pre-qualification of a potential supplier).
After you have done this, take a screenshot, or get a digital copy, and send it to your supplier.
Important tips:
- Make sure to avoid any misspelling, which might cause the payment instruction to be held in limbo for weeks!
- You will need to write the company name in English, not in Chinese. Don’t try to do your own translation job, even if your written Chinese is excellent! It has to match exactly the English name that is registered in the seller’s bank records.
- If the company name is too long, keep writing it in the “address 1” field. This is sometimes mentioned on the T/T payment forms of banks that work a lot with China.
Other Payment Methods?
For small orders, other payment methods such as Paypal and credit cards are also acceptable.